Getting started with ESP8266 using the Arduino IDE
Introduction
In an earlier earlier post we saw how to get started with ESP8266 on a NodeMCU board using Micropython. The setup required many steps including the installation of the driver, the bootloader. Following that, the setup required installation of separate applications for serial communications and code upload. Going through these steps can help us appreciate the various parts of the process. But setting up the process on new computers or for different variations of the microcontrollers is tedious. Once we understand the setup, the actual steps can distract us from what is the main attraction for the most of us: exploring different hardware ( Infrared, RF, Bluetooth, motor control) or creating cool projects. It’d be great to have a tool that takes care of the whole set up process and lets us focus on making things. This tool is the Arduino IDE.
The Arduino IDE
IDE stands for Integrated Development Environment. An IDE is a software for enabling developments of a certain kinds of applications. For example Jetbrains IntelliJ is an IDE for Java development. Android Studio is an IDE for developing Android application. There are IDEs for nearly all major application types including Apple products (Xcode), C/C++ (CLion, Qt), and Python (Pycharm). Each IDE makes it easier to perform environment setup, library search and installation, auto-complete, code browsing and other repetitive tasks.
The Arduino IDE makes it easy to develop robotics and embedded applications on the Arduino microcontroller board. Though primarily developed for Arduino, the IDE nevertheless has been extended for use with other microcontrollers, including the ones from the ESP family (ESP8266 and ESP32).
The steps to get started with the Arduino IDE are a breeze compared to those with MicroPython. Beyond the ease of the setup, however, there are more powerful advantages to using the Arduino IDE. First, there are hundreds of examples for each board type. These examples are invaluable in helping you test your setup or in getting you started quickly. Second, a lot of online help about specific projects is presented in the context of the Arduino IDE. Third, there are a lot of third party, hardware specific libraries (e.g. for IR remotes) on Github; they are written in C/C++ and can be loaded into the Arduino IDE using a single click. Fourth, the IDE makes the documentation of every function available with a single click. Sixth, the IDE supports auto-complete. Lastly, C/C++ is the primary language of Arduino (though it now supports MicroPython) which gives us a forcing function to learn this important embedded language. Of course, as mentioned above, use of C/C++ makes a vast body of code available for our use – code not available in MicroPython.
Steps to get started
Download and install the Arduino IDE
This step is self-explanatory. Just download the software and follow the steps to installation.
Install the ESP8266 board
Start the Arduino IDE. Go to Preferences (⌘+,) and under “Additional Board Manager URLs” add the URL for ESP8266.
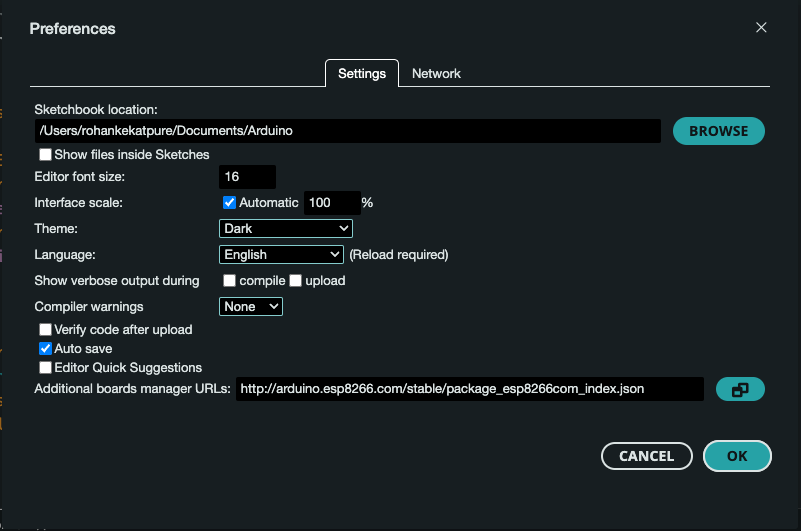
The URL is
http://arduino.esp8266.com/stable/package_esp8266com_index.json
This JSON points to the various repositories (Github and otherwise) needed for driving boards in the ESP8266 family
through the Arduino. Once the URL is added, go to Tools -> Board -> Boards Manager, select your board and click
install. Once the installation finishes, you’re ready to start coding !
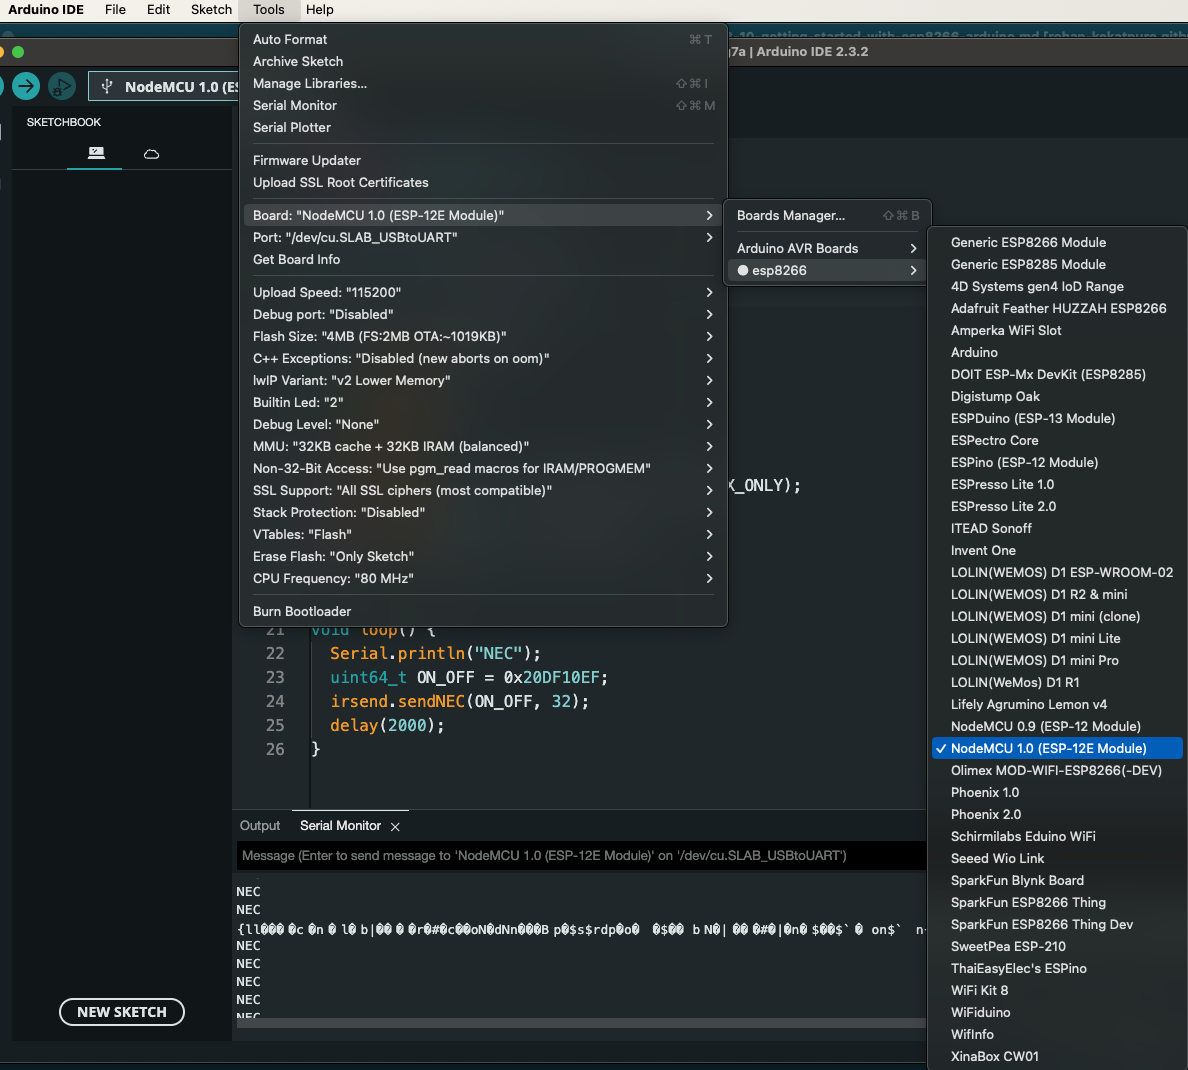
Other board families can be managed similarly by adding their URLs to the board manager URLs (separated by commas) and installing the right board from the family.
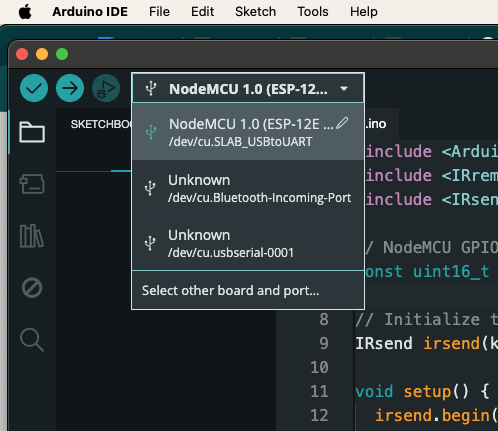
Connect to the board
Connect the board to the computer using the USB cable. After a few seconds ,the board should appear in the drop-down list of serial devices.
Run the LED blink code
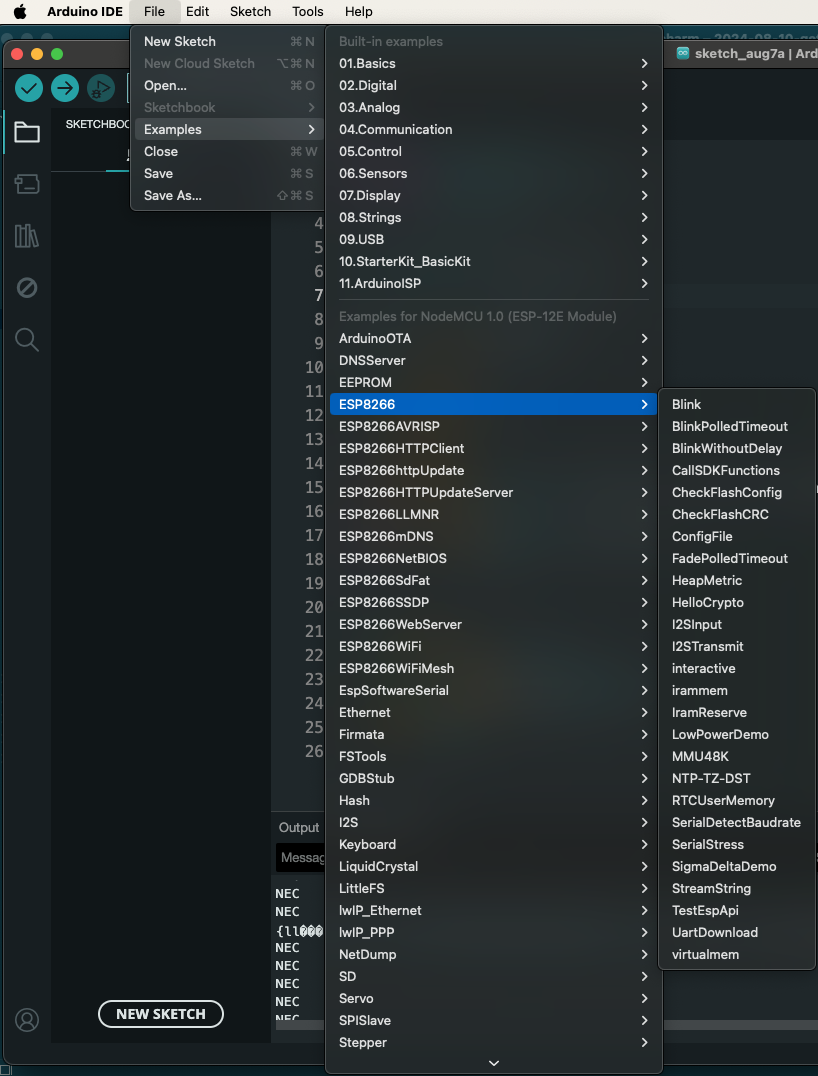
As mentioned above, Arduino IDE comes with many examples for all supported board types. Select the blink example and press the Play button. This will upload the code to the ESP and blink the builtin LED.
This completes the installation and the testing of ESP8266 using the Arduino IDE. You can clearly see that the setup and use is much easier compared to the steps we followed for MicroPython.
Written on August 10th, 2024 by Rohan